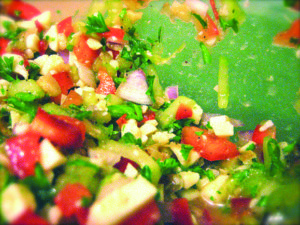
 As soon as we get past January 1st, I start to feel impatient. It’s the time of year I start planning what to grow in my quest for the most perfect Homemade Salsa. Every year, I try several new varieties to find the most flavorful tomatoes, the freshest tasting herbs, and the sweetest corn. Most unusual varieties have to be grown from seed. If you want to join me on my quest, I’ll give you a few of my greatest Secrets to growing great Salsa Ingredients from seed.
Use Good Seed Growing Trays. I prefer the little trays you can purchase at Bi-Mart that have the clear covers to help hold in moisture. I have used the jiffy pellets with good results. You get them wet and they swell up into a little round dirt pots, ready to grow. One of the things I love about them is that you plant the entire thing with absolutely no mess. If money is an issue, you can also use paper egg cartons in plastic vegetable bags. I start most everything inside in those little pots, it really helps improve germination and stop birds and things from digging up and eating the seeds.
Certain Trays to Avoid. Now, I’ve tried most of the small green house sets. These are the ones that have the peat pots included and need to be cut apart to be planted. Do not buy those! They don’t break down and your plants will be severely stunted by the time you realize what the problem is. Some of my plants never recovered. Several of the jalapenos I planted in them, never grow very well and really struggled to survive. I finally dug one up and discovered the roots were poking through some of the pot but not enough to actually grow through the pot. Stick to the peat pellets or use potting soil in the little plastic seed starting set up. I have used the same ones for years.
 Use the Right Seeds. If you tried starting seeds and suffered failures, your problem was most likely the seeds. In Steve Soloman’s Growing Vegetables West of the Cascades, he goes over the dirty little secrets of the garden seed industry. It turns out they sell the sweepings from the floor to gardeners. I have tried many seed packets purchased at stores department store and never had good results. I’ve had great results with Territorial Seeds in Cottage Grove OR. You can order online or buy them locally at Seven Dees and several other local nurseries. Johnny’s Selected seeds and Park seeds have also provided excellent results. http://www.territorialseed.com/ http://www.johnnyseeds.com/ http://www.parkseed.com I prefer heirloom seeds for the ability to save your own and I do several varieties every year. I admit some lack the vigor of the hybrids. I’ve read that you can breed hybrids back to breeding true in only three generations. But I’m still experimenting to see if this is true.
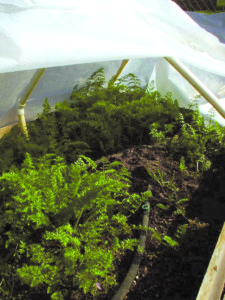
 It’s good to start early. I start lettuce, spinach, onions, broccoli, cabbage, tomatoes and peppers, eggplant and cauliflower indoors in the trays usually in January or February. Beets and carrots can be started either outdoors or indoors. If you do it outdoors use 1′ sections of bar in the ground, 3′ apart with ½” PVC pipes, cut 10′ long and placed over the re bar. Then put clear plastic over the PVC to hold in the warmth and keep out the flooding rains that wash away seeds. Territorial Seeds sells cloche clips to hold the plastic on. But clothes pins or binder clips work as well. All of the above mentioned produce can be planted out very early. Some years they will keep over winter for continuing harvest if planted late. It’s the constant rains that cause cabbage and such to rot and the plastic covers prevent this. I harvested lettuce just yesterday from the garden and carrots and beets are still there ready for harvest. I plant snow peas outdoors on February 14 (Valentine’s Day) and Potatoes on March 17th (St. Patty’s).
Use a Heating Mat. You will benefit from the use of a seed starting heat mat. Many seeds germinate more readily with bottom heat. You don’t need lots of them. I just use one. Once the seeds in the tray have germinated I swap it out for another tray. This helps to get more use out of the seedling mat. I have a 4′ florescent shop light hung over my seed starting area on a shelf in the garage. The light is kept just a few inches from the plants. This generally works well for getting stocky plants started. Once they are germinated you don’t want it too warm, or they will get weak and spindly. If that happens, they are then more likely to succumb to disease. And you will have to harden them off for a longer period before planting them out.
Know When to Move Outside. Lettuce, beets, spinach, and onions, once started, can be planted outside, with the plastic covers, as early as the ground can be worked or after the last frost. I generally start tomatoes, peppers, eggplant, cabbage, broccoli, and cauliflower 6-8 weeks before last frost. If you keep them in pots too long they often end up stunted. You’ll have even better results putting them out sooner if you put them under “Wall O Waters.” They are little water filled covers. I have seen tomatoes survive inside them even when the “Wall O Waters” froze around them! Late in the season you can also use the PVC plastic covers to extend the harvest past the first couple of frosts. Put a gallon milk jug, filled with water, inside the plastic cover to hold down the plastic. It acts like a heat sink and adds needed warmth on cold nights. Seedlings grow much better outside in the ground than inside in potting soil! I once accidentally did an experiment I was planting out seedlings and when ½ were in the ground a torrential downpour began. I grabbed the unplanted tray and went inside 2 weeks later when I had the opportunity to finish planting out the seedlings the ones that had been outside subjected to cold and rain were much larger and healthier than the ones I babied inside. Starting early and extending the harvest will often increase the amount harvested in a season dramatically.
Use Clean, Sterilized Potting Soil. For this you can just use potting soil or sterilize your own soil in the microwave. To do it yourself, place two pounds of soil into a thick plastic Freezer bag. Don’t use a thin “sandwich” type bag or it will melt in the microwave. Place the bag in microwave leaving the top open for ventilation. Microwave on high for two and a half minutes. Remove from microwave promptly and seal the top. Allow to sit until cool, then use. You can keep the soil in the bag with the top closed for storing. This method will not smell your house up quite as much as using an oven, but you can only sterilize smaller portions of potting soil at a time. Remember—do not heat for longer that two and a half minutes or you can make the soil toxic.
Starting with good seed and using clean soil will go a long way toward ensuring success. You’ll also be delighted with the money you can save and the exceptional varieties of vegetables you will be able to try. Freshly harvested, home grown herbs add so much more flavor to your salsa than dried herbs ever could. It’s fun, saves you money, and tastesgreat. So put on your gardening gloves and get started. It’s time to get planting!
No Comments
Leave a comment Cancel